 Although we studied a variety of movies and movie trailers, ‘The Orphan’ was our main inspiration as you will see from our final product. http://www.youtube.com/watch?v=ku_4tucwzZ4, http://www.youtube.com/watch?v=aD3pyIO2EfI
There are many similarities for example the protagonist character in our horror movie teaser trailer her hair is also in two pony tails to give off a sense of innocence, we chose not to use a lot of blood and gore because we wanted to break the typical conventions of blood, weapons and gore so we decided to put a limit on the amount of blood we used. ‘The Orphan’ used a minimal amount of blood and the movie managed to be bloodcurdling and gross a profit of $6,826,736 (Worldwide).
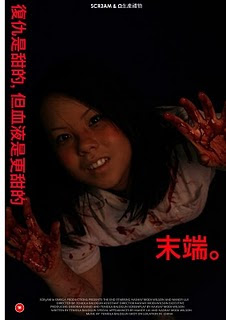
Moreso my group and I had always wanted to push ourselves that one step further – making an Asian poster to target the ethnic minority of Asians and this led us to researching how the Asian film industry works in terms of the style of their horror movie posters and trailers. As a group we gained knowledge and our research reflected how the Asian film industry works- the Asian public liked plain and simplistic designs as op posed to the British public.
 posed to the British public.
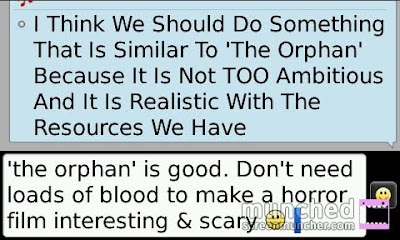
 We each decided to further our research knowledge, because we knew that lesson time would not be enough time to complete all three tasks to a high standard. As a result we set our selves tasks to go away read and research in more depth and detail plus feedback to the group via Blackberry messenger which played a big part in our communication as a group. The image below displays this. 

My group and I had to distinguish between a theatrical trailer and a teaser trailer once we had established the difference we then had to each analyse a teaser trailer, just to prove that we know exactly what to look for and the purpose of certain shots and the way in which the editor chose to edit a particular shot/s.
We used a variety of technology the internet being our main source of technology to watch make-up tutorials.http://www.youtube.com/watch?v=_ZysEaHiY34, http://makeup.lovetoknow.com/Category:Halloween_Makeup_Techniques Wikipedia and Google also gave us some tips on how to make scabs look real. Below are some of the photographs we took when we were experimenting how to make wound as realistic as possible.
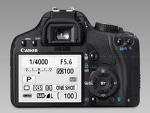
Throughout the process of our coursework the Cannon Camera EOS 450d
 was an important piece of technology if not the most important because we had to take our photographs using it, using the Camera was much more difficult than we thought as we had to get the focus right and the colour settings although we could do this on Photoshop getting it right with the raw image would give us less work to do in the editing process. Furthermore we used a software called Adobe Photoshop, which we were all familiar with because we had all used it prior to our AS course. Adobe Photoshop is graphics editing programme published by Adobe systems incorporated. This software allows you to adjust or remove the colour of your photograph, refine or blur images and also create special effects; Photoshop was very handy when it came to designing our magazine front cover and movie poster. We were able to adjust the brightness of one of our photographs that had Mandy on the magazine front cover. We also used a website to download our fonts into Photoshop http://www.dafont.com/ this website was useful because it gave us some excellent stylised font to reflect the horror genre and mood that we wanted to create with the font both on the movie front cover, magazine and also our teaser trailer.
When editing the group used technology called Final Cut Pro which is only available on Apple Mac computer/ laptops.
 Final cut pro made it possible for the group to produce the final product, deleting scenes we no- longer wanted , putting scenes together and adding sound onto our teaser trailer. Final cut Pro was a complex piece of technology during the first stages of editing, until we got the hang of it which took us quite a while, roughly 3-5 days after beginning the project.
 For the duration of the stage of pre-production, production and post- production the construction of media technologies involved in research planning and the evaluation processes was the key and most important part in helping and make produce the final product. As a group we enjoyed working together and we are pleased with our final products. Although it was a challenge working in a group, we overcame that challenge and we each went up a steep learning curve. We are hoping that our hard work and effort will reflect in the grade that we are each rewarded with. Nashay Ends
Teniola Starts.Using media technologies was a very important part in the planning stages of creating our product. Throughout the planning stages using technology was an essential part as we needed the practice to develop our skills for the real time when we begin shooting. My group and I needed to be fully aware, trained and up to date with our skills in all aspects of creating our products. http://unsceneproductions.blogspot.com/2011/01/brainstorming-ideas-for-planing.html In the above blog post, posted by myself earlier this year, I explained ways in which my group and I can show how we used media technologies in the planning stages of our product. We decided we wanted to show this visually as it gives a better understanding of what we went through. Looking at this spidergram, my group and I began putting our ideas into practice and uploading template trailers, posters and magazine front covers we looked at for ideas, help and inspiration. http://unsceneproductions.blogspot.com/2011/01/template-trailers.html http://unsceneproductions.blogspot.com/2011/01/as-group-we-agreed-to-keep-our-horror.htmll The link below shows a blog post created by my team member Nashay developing my own blog post with much more detail and specification, explanation and examples. In her blog post she not only develops my earlier post, she goes on to talk about the research stages when using media technologies. http://unsceneproductions.blogspot.com/2011/01/process-of-our-final-product-planning.html
After my group and I came up with a concept for our trailer, and finished looking at other trailers, posters and magazines we decided that we needed to get more practice and into depth with the cameras, so we are fully prepared for when we have to begin filming and taking pictures. My group and I practiced with the cameras by taking location shot pictures which gave us the preparation and ability to familiarise ourselves. We went around our college, with our storyboard and attempted to manipulate that into real form. We looked closely around our college, to see if we could find a location where what we wanted worked well, and could come across or at least represent horror after manipulated with lighting, costume and make-up. My group and I managed to take a lot of photos, in good quality and focus, which we posted to our blogger with text underneath explaining the shots and reasons why we chose there.
At times, in the beginning stages, my group and I found that we wasted less time when we went filming for real as at times our vision we wanted didn’t come out how we wanted when assembling in specific ways (e.g. camera and tripod). There were many occasions were my group and I had a set vision of what we wanted to accomplish during our filming times and then once we set up the equipment with lighting and make-up we realised it didn’t work, meaning we had to change it there on the spot, which meant going back to the storyboard and changing that again. I think this may have happened because although we practiced taking pictures with the camera, we didn’t plan practicing filming with the cameras, so we were kind of new to it and crumbled, as we took it as it came.
We also sometimes found it difficult to assemble the tripod without the help of Adam, as in times where we were rushing, putting equipment together didn’t work, as we weren’t focused on setting up but more of trying to create enough time to get our objective of the day done (taking pictures, filming) achieved as soon as possible. We also found that it took longer to start filming, or to set up without the help of teachers. But towards the end, we were okay as a group. What we didn’t realise was that setting up equipment was an important and huge part of the project and we sometimes forget that it isn’t easy or quick to set them up, it takes time. The time spent setting up equipment, needs to give us enough time to then later film as much as possible, then pack up again. Teniola Ends.


